Concept
There are several different basic composite hull structures that boats use. In the fiberglass world, there are double hulls and single hulls. Double hulls form an extra watertight barrier so that even if the outer hull is penetrated, the inner hull will be able to keep the ocean out. Single hull boats only have one layer of hull structure. Because of the different properties of these hull designs, different mounting techniques must be used for various components in the boat.
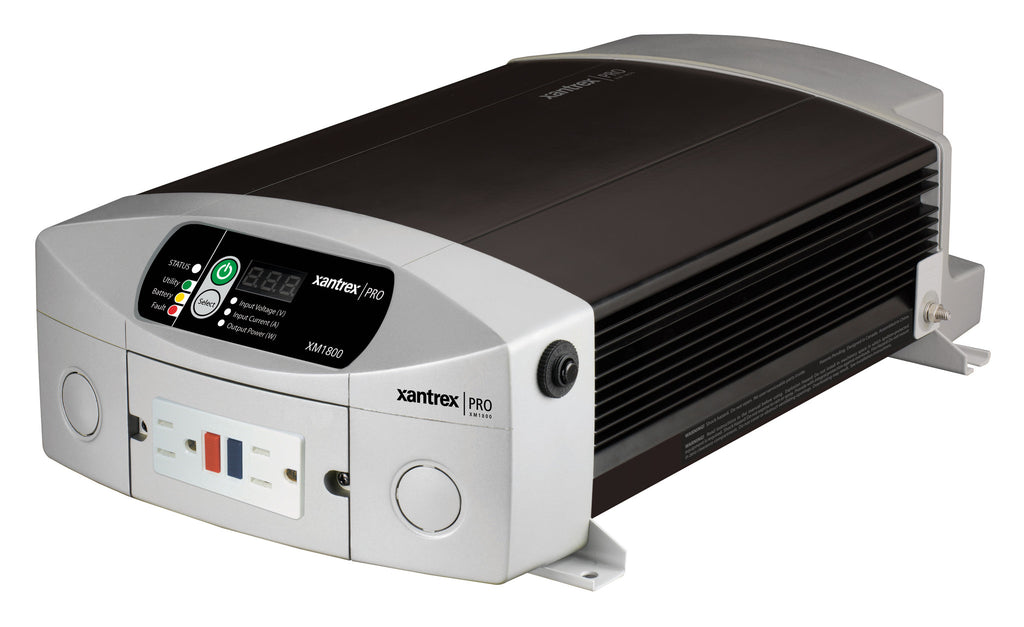
There are numerous ways to mount an inverter to the inside of the hull, for my single hulled Cal 34 I decided to repeat a mounting design that was successful on my last boat, a Cal 27. This process involves Making a mounting bracket that can be adhered to the inner hull. A flat panel is impractical for adhering to a curved hull shape, so this technique involves adding small blocks to the back of the panel, which can more easily be shaped to form a strong bond with the curved hull.
While it may present no issue mounting the inverter directly to a single hull with short screws. This hull design presents other problems for electronics specifically. There is less material between the hull and the water, so single hulls often feel the effects of the cold water around them more than doubles. Mounting warm electronics on a cold hull is a recipe for condensation. Mounting on a bracket allows for ample airflow against the hull and controls any moisture buildup that may damage your electronics.
Materials
For the bracket I chose to use a 6-ply 1/2" marine plywood for the panel and a 1-1/2" x 1" length of soft pine for my blocks. The main drawback to using wood in this application is the risk of rot. Even with a proper sanding and some kind of sealant, the potential for rot is there. To avoid this risk completely some people resort to "marine lumber." Available in white or black and constructed out of a high-density polyethylene that is easily shaped with standard woodworking tools, this is essentially a fool proof material with no chance of rot or degradation. The only disadvantage that marine lumber carries is that it can be unsightly, marine lumber sticks out like a sore thumb in a boat with wood decor. My last bracket was constructed out of wood and sealed with multiple coats of polypropylene for a clean durable look. It showed no signs of rot or wear on an incredibly damp boat over the winter. I will be mounting this panel on the wall of my starboard side quarter berth, as close to the batteries and as out of the way as possible.
- Plastic marine lumber or wood for panel (sized for inverter)
- Small blocks to conform to hull shape
- Sealant/varnish (if using wood)
- Wood glue (if using wood)
- Fasteners for attaching blocks and inverter
- 3M "5200" OR "4200" for attaching to Hull
My Steps (Wooden Construction)
- Mark the holes that you will need to mount the inverter on your plywood. Using a straight edge, mark and cut out your appropriate sized piece.
- Measure and cut out blocks that will be mounted on the back of the plywood panel. I used six 2" blocks that spaced out nicely along the top and bottom edges of the panel.
- Give all of your components a thorough sanding, I started with 100 grit and worked up 120, 180, 220.
- Using wood glue, attach the blocks to the back of the wood panel. Hold the glue to dry with one permanent fastener per block, be strategic so as not to impede the fasteners for your inverter.
- After the glue has dried, you will need to sand your blocks to conform to the hull shape. Mark the area where the blocks will make contact with the hull and use an inspection light to check for gaps. Make sure there is no wiggle room to ensure good adhesion to the hull. This can be a bit of a process.
- Give the whole operation a blow off with the shop-vac, compressed air, etc.
- Seal the wood with whatever finish you have chosen. Follow manufacturer recommendations for coats, sanding, and dry-time. I used three coats of high gloss polyurethane with a light 220 grit sanding in between the 2nd and 3rd coat.
- Give the blocks a healthy coat of '5200' and prepare to stick the bracket to the hull. You may have to get creative with your clamping. Last time I did this it was on the port side main cabin wall, I was able to use my standard adjustable boat hook stretching across the cabin to hold the bracket against the wall until the adhesive cured. The "boat hook clamp" method worked well again in this project, even with S/V Halcyon's 10' beam.
- With the bracket secured to the hull, you can mount your inverter using bolts, or just wood screws. Not a bad idea to seal the wood around these new attachment points with a little silicone.


